
Cozy, Crispy, Cheesy Comfort in One Pan
Chili Cheese Tater Dinner Ideas
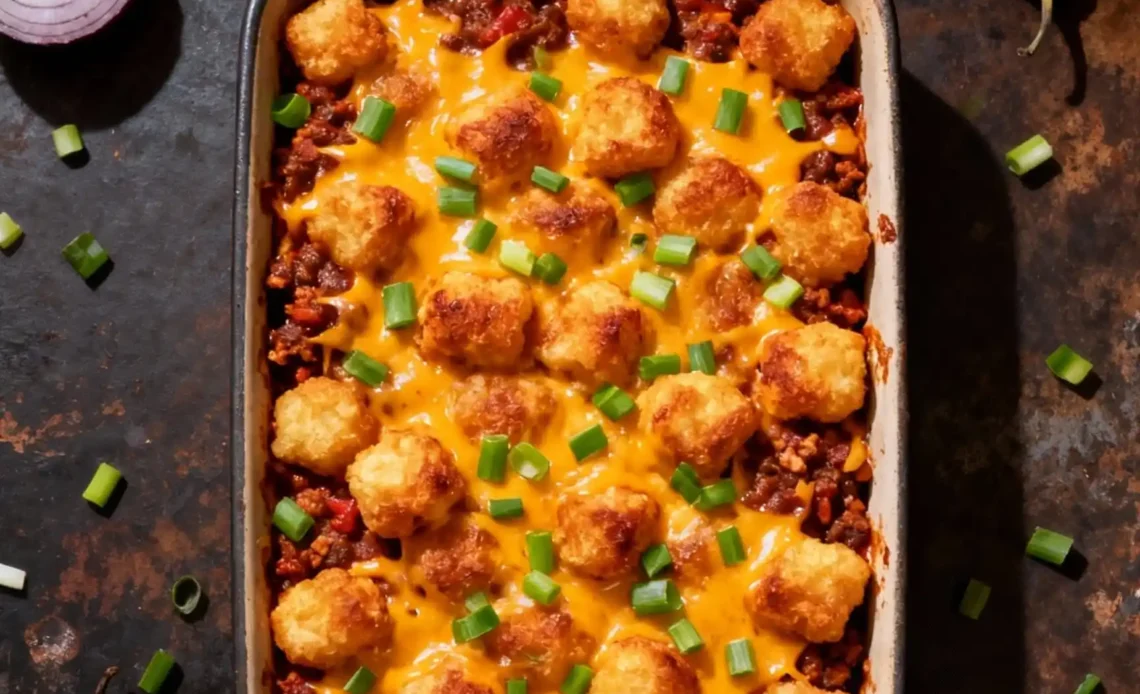
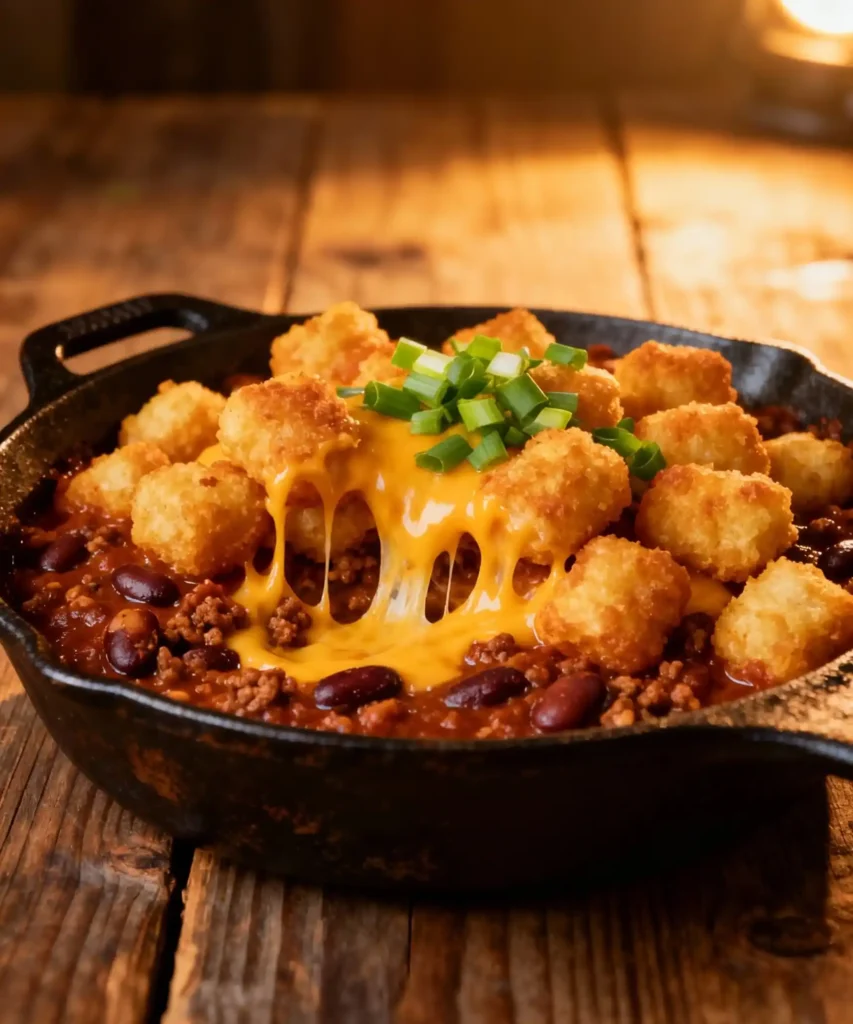
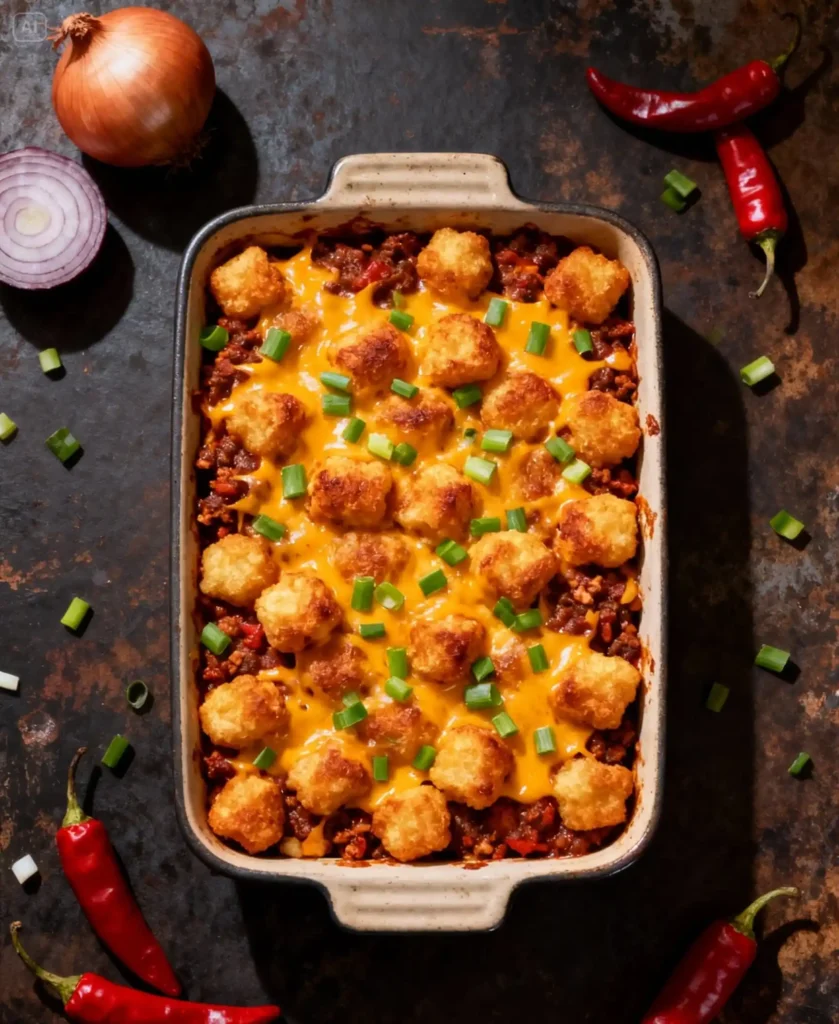
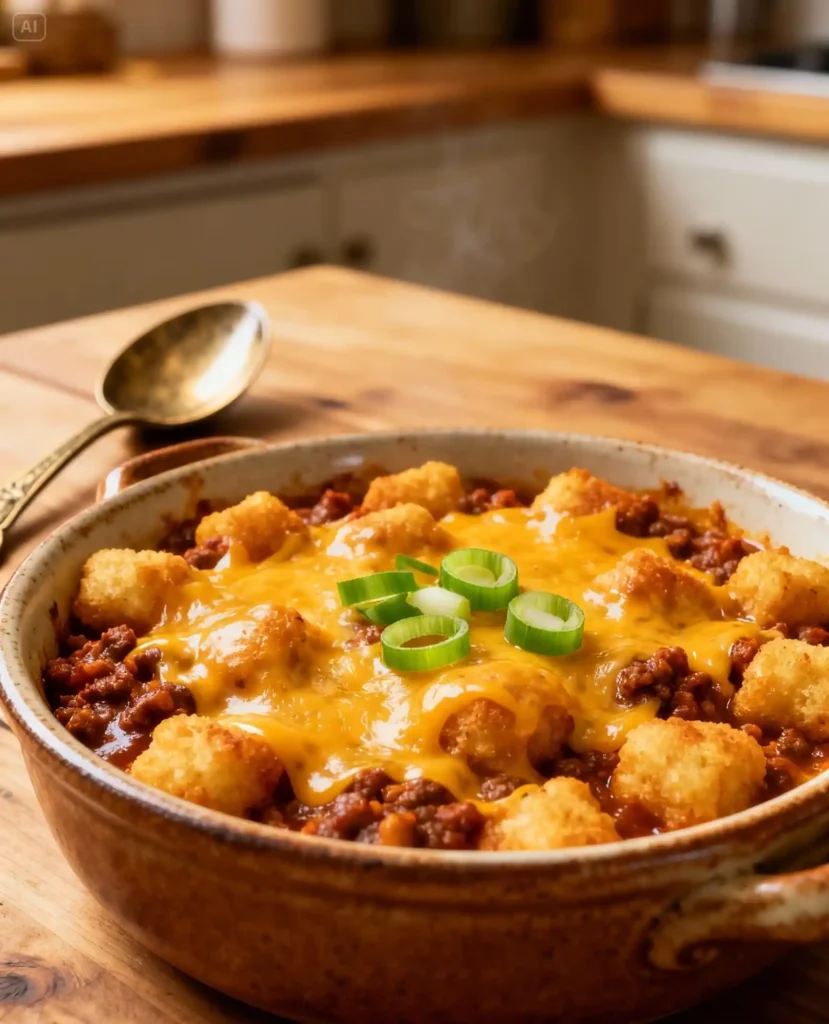
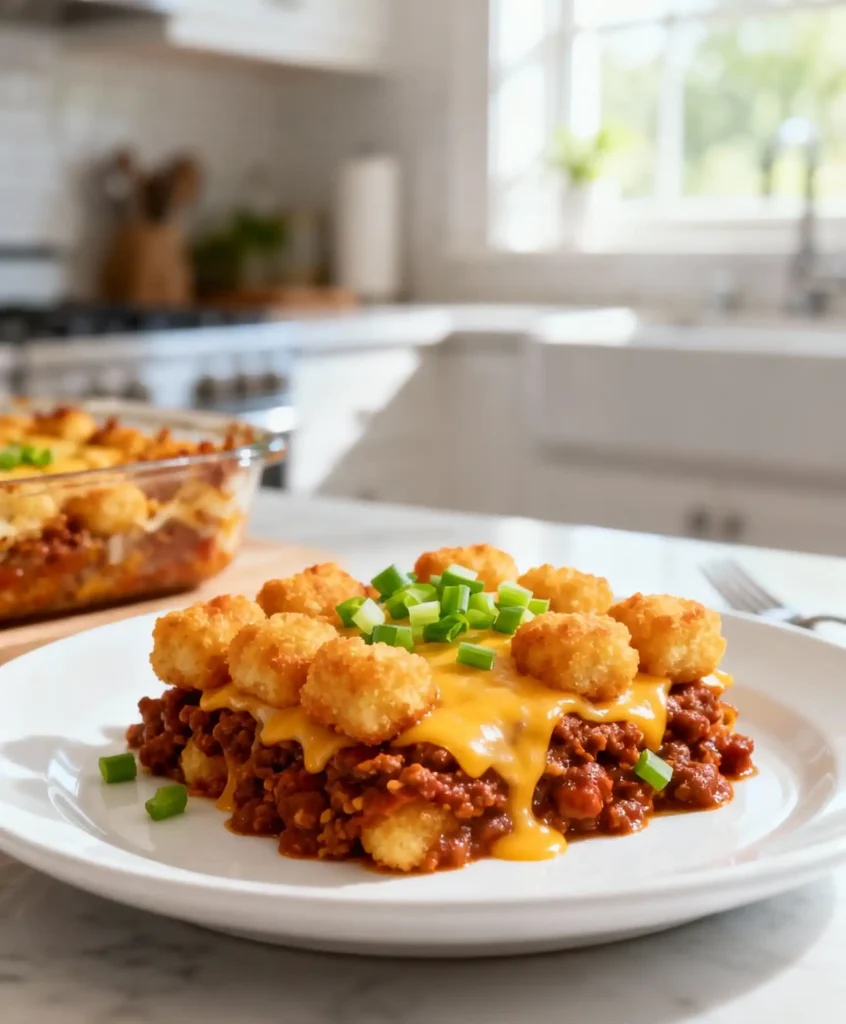
Think of a pan of hot chili, thick and rich, topped with a full layer of crunchy tater tots and a blanket of melted cheese. You scoop in and get everything in one bite. A little spice from the chili. Salty, crispy potatoes. Gooey cheese pulling as you lift the spoon.
It feels like bar-style chili cheese fries, but easier to share and much easier to make at home. You only need a skillet, a baking dish, and some simple pantry ingredients. It works on busy weeknights, game days, or any night when you want comfort food without a lot of work.
You can use homemade chili when you have time, or canned chili when you don’t. Swap the meat. Change the cheese. Keep it mild for kids or spicy for friends. This chili cheese tater dinner is flexible, forgiving, and pretty hard to mess up.
Why You’ll Love This Recipe
- Uses simple, budget-friendly ingredients.
- Feels like takeout bar food but bakes in one pan.
- Easy to scale up for parties or down for a small family.
- Works with homemade or canned chili.
- Kid-friendly and easy to adjust for picky eaters.
- Great for leftovers and meal prep.
- Tons of easy variations: Tex-Mex, vegetarian, breakfast-style, and more.
Ingredients (Exact Measurements)
Serves 6–8 in a 9 x 13 inch pan.
Chili Layer (Homemade Version)
- 1 tablespoon olive oil (or other cooking oil)
- 1 pound ground beef (or turkey, chicken, or plant-based crumbles)
- 1 small yellow onion, diced (about 1 cup)
- 1 small bell pepper, diced (any color, about 1 cup)
- 2 cloves garlic, minced (about 2 teaspoons)
- 1 can (15 ounces) tomato sauce
- 1 can (14.5–15 ounces) diced tomatoes with green chiles
- 1 can (15 ounces) kidney beans, drained and rinsed
- 1 can (15 ounces) black beans, drained and rinsed
- 2 tablespoons chili powder
- 1 teaspoon ground cumin
- 1 teaspoon smoked paprika
- 1 teaspoon salt (plus more to taste)
- ½ teaspoon black pepper
- ¼ teaspoon cayenne pepper (optional)
- ½ cup water or low-sodium beef broth, as needed
Tater Tot & Cheese Topping
- 1 bag (32 ounces) frozen tater tots
- 2 cups shredded sharp cheddar cheese (about 8 ounces)
- 1 cup shredded pepper jack cheese (about 4 ounces, optional)
- ¼ cup sliced green onions (for topping)
- 2 tablespoons chopped cilantro or parsley (optional)
For Serving (Optional)
- Sour cream or Greek yogurt
- Extra shredded cheese
- Sliced jalapeños
- Hot sauce
- Diced red onion
Shortcut Option (Using Canned Chili)
Instead of making chili from scratch, you can use:
- 3 cans (15 ounces each) prepared chili, with or without beans
Step-by-Step Instructions (With Tips)
1. Preheat the oven
Set the oven to 400°F (about 200°C). Grease a 9 x 13 inch baking dish and set it aside.
Tip: A hotter oven helps the tots get crisp. If your oven runs cool, 425°F can work too.
2. Brown the meat
Heat a large skillet over medium-high heat. Add the oil, then the ground beef. Break it up with a spatula. Cook 5–7 minutes, until no pink remains.
If there is a lot of fat, drain most of it. Season with a small pinch of salt and pepper.
3. Cook the veggies
Add the diced onion and bell pepper to the skillet. Cook 4–5 minutes, until softened.
Add the minced garlic. Cook 30–60 seconds, just until fragrant. If it starts to brown, lower the heat.
4. Build the chili
Add tomato sauce, diced tomatoes with green chiles, kidney beans, and black beans. Stir well.
Add chili powder, cumin, smoked paprika, salt, pepper, and cayenne if using. Stir again.
Pour in about ½ cup water or broth. You want a thick but spoonable chili, not soup.
Tip: If it looks too thick, add a splash more liquid. If it looks soupy, let it cook longer.
5. Simmer for flavor
Lower the heat to medium-low. Let the chili simmer 10–15 minutes, stirring now and then.
Taste and adjust salt or spice. If it tastes sharp or acidic, you can add 1 teaspoon brown sugar, but that’s optional.
6. Transfer to the baking dish
Pour the hot chili into the greased 9 x 13 inch dish and spread it in an even layer.
If the chili seems very loose, let it sit a minute or two to thicken before adding the tots.
7. Add the tater tots
Place frozen tater tots in a single layer over the chili. Cover the whole surface.
Tip: Keep tots frozen; they crisp better this way. You can lightly spray the tops with oil for extra crunch.
8. Bake until tots are crisp
Bake at 400°F for 30–35 minutes, until the tater tots are golden and the chili bubbles at the edges.
If the tots look pale but the chili is hot, switch to broil for 2–3 minutes. Watch closely so they do not burn.
9. Add the cheese
Pull the pan out. Sprinkle the cheddar and pepper jack evenly over the tots.
Return to the oven for 5–10 minutes, until the cheese melts and starts to bubble.
For browned cheese, broil for 1–2 minutes at the end, keeping an eye on it.
10. Rest and serve
Let the casserole rest 10 minutes. This helps it set so each scoop holds together.
Top with sliced green onions and herbs. Serve with sour cream, jalapeños, and hot sauce on the side.
Serving Suggestions and Party Ideas
Simple Family Dinner
- Serve in bowls with a spoonful of sour cream on top.
- Add a quick green salad or steamed broccoli on the side.
- Warm tortillas or cornbread are great for dipping.
Game Day Spread
Turn it into a “chili tot bar.”
- Keep the pan warm in the oven on low.
- Set out toppings: salsa, guacamole, jalapeños, diced onions, shredded lettuce, hot sauce.
- Let people scoop their own and load it up like nachos.
Casual Potluck
- Bake in a disposable foil pan for easy transport.
- Bring extra cheese and toppings so you can refresh the top if it sits for a while.
Variations and Themed Ideas
Tex-Mex Style
- Use taco seasoning instead of plain chili powder and cumin.
- Swap one can of beans for a can of corn (drained).
- Top with cheddar and Monterey Jack.
- Serve with lime wedges and salsa.
Vegetarian Version
- Skip the meat.
- Use 2–3 cans of beans total (kidney, black, pinto).
- Add extra veggies like corn, zucchini, or mushrooms.
- Use vegetable broth.
Cheese stays the same, or use dairy-free cheese and vegan tots for a vegan version.
White Chicken Chili Tater Bake
- Use 1 pound shredded cooked chicken.
- Skip tomato sauce and red tomatoes.
- Use 2 cans white beans, 1 small can diced green chiles, and about 1½ cups chicken broth.
- Season with cumin, oregano, garlic powder, and onion powder.
- Top with pepper jack and mozzarella.
Breakfast-For-Dinner Twist
- Use cooked breakfast sausage instead of ground beef.
- Whisk 6–8 eggs with ½ cup milk, salt, and pepper.
- Stir the sausage, some cheese, and eggs together in the dish.
- Top with tots and bake until the eggs set and tots are crisp, then add more cheese.
Pro Tips for Best Results
- Keep tater tots frozen until they go in the oven.
- Use a hot oven (400–425°F) for a crisp top.
- Make sure the chili is thick, not watery.
- Taste and season the chili before baking.
- Let the casserole rest 10 minutes before serving.
- Grate your own cheese if you can; it melts smoother.
- Place the baking dish on a sheet pan if you worry about drips.
FAQ (10–12 Common Questions)
1. Can I use canned chili?
Yes. Use about 3 cans (15 ounces each). Spread in the dish, top with tots, bake, then add cheese as directed. You can still add extra chili powder or cumin for more flavor.
2. Can I make it ahead?
Yes. Make the chili up to 2 days ahead and store in the fridge. When ready, spread cold chili in the dish, top with frozen tots, and bake. Add 5–10 extra minutes since it starts cold. Add cheese near the end.
3. Can I freeze it?
Yes.
Before baking: Cool the chili, spread in a freezer-safe dish, top with tots, wrap well, and freeze up to 2–3 months. Bake from frozen at 375–400°F until hot and crisp, then add cheese.
After baking: Cool leftovers, freeze in containers, reheat later. Tots will be softer but still good.
4. How do I reheat leftovers?
Reheat in the microwave in 45–60 second bursts until hot. Or reheat in the oven at 350°F, covered with foil, for 15–20 minutes. Remove foil at the end to help the top firm up a bit.
5. What meat works best?
Ground beef has the most classic flavor. Turkey or chicken are lighter but still tasty. Sausage adds extra flavor but more fat and salt, so adjust seasoning. Plant-based crumbles also work if you want it meatless.
6. Can I make it without beans?
Yes. Leave out the beans and use 1½–2 pounds of meat instead, or add more veggies like mushrooms or corn. Just keep the chili thick and well seasoned.
7. What cheese should I use?
Sharp cheddar is a safe choice. Pepper jack adds a nice kick. Monterey Jack, Colby Jack, or a Mexican blend also work. Avoid using only very dry cheeses like Parmesan, since they don’t melt into a gooey layer.
8. How spicy is it?
The base version is mild to medium. For less spice, use plain diced tomatoes, skip cayenne, and use mild cheese. For more heat, add more chili powder, cayenne, jalapeños, or use pepper jack.
9. Can I make this gluten-free?
Usually yes. Most tater tots are gluten-free, but check the package. Use gluten-free broth and seasonings, and check labels if using canned chili. Once those are safe, the recipe should work for gluten-free diets.
10. Can I cook the chili in a slow cooker?
Yes. Make the chili in a slow cooker (6–8 hours on low or 3–4 on high), then transfer it to a baking dish, top with frozen tots, and bake as usual. The slow cooker is for the chili only; the tots need the oven to crisp.
11. How do I scale the recipe?
For fewer people, cut everything in half and use an 8 x 8 or 9 x 9 inch dish. For a crowd, double the recipe and use two 9 x 13 pans. Baking time is about the same; just check for crisp tots and bubbling chili.
12. What should I serve with it?
Simple sides work best: green salad, coleslaw, steamed veggies, cornbread, or a fruit salad. The main dish is rich and filling, so light sides balance it out.
Conclusion
This chili cheese tater dinner gives you the comfort of chili, the crunch of tater tots, and the pull of melted cheese in one simple pan. It works on nights when you want something easy and familiar, and it’s flexible enough to match whatever you have in the pantry.
Once you make it once and see how your oven handles the tots, it becomes one of those “keep on hand” meals you can throw together without thinking too much.